Mysteries of the sea
Echoes of the Deep: Australia’s Maritime Legacy
The enigmatic secrets of the ocean and the intriguing tales of maritime history have long captivated historians and ocean enthusiasts alike. Delving into the depths of the sea uncovers a world of wonders and mysteries that have remained hidden for centuries.
In Australian waters, the legendary stories of vessels like the aircraft carrier HMAS Melbourne, the ill-fated coastal steamer SS Coramba, and the preserved corvette HMAS Castlemaine stand as testaments to this seafaring past. The rich history surrounding these ships is deeply woven with threads of adventure, tragedy, and heroism, making them timeless subjects of exploration and historical preservation.
The Shifting Breeze: 1920
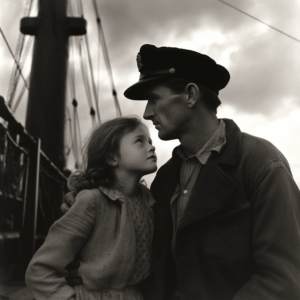
The year was 1920, a time indelibly etched into the memory of twelve-year-old Audrey O’Callaghan. It was the last day she would ever see her father, Captain John Dowling—a man whose presence filled her childhood with unwavering love and the comforting, sharp scent of saltwater. Though decades had since passed, the image of their parting remained as vivid as yesterday, a poignant scene painted in the tender hues of childhood innocence and a quiet, growing premonition of sorrow.
Her father, a seasoned man of the sea, was embarking on what should have been a routine voyage aboard the cargo steamer TSS Coramba. Bound for Warrnambool in Victoria’s south-west to collect goods, he was scheduled to return in just a fortnight. It was a seemingly insignificant stretch of time, yet a subtle unease—like a shifting breeze before a storm—lingered in Audrey’s heart.
The two shared an exceptional bond, forged through years of shared laughter, whispered secrets, and the comforting weight of his hand on her shoulder. That deep connection was woven into the quiet goodbyes they exchanged on that fateful day. As she kissed her father goodbye, her small voice, tinged with a sudden melancholy, uttered a wish that would forever haunt her: “Dad, I wish you were at home every night like other dads.”
HMAS AE2: The Silent ANZAC
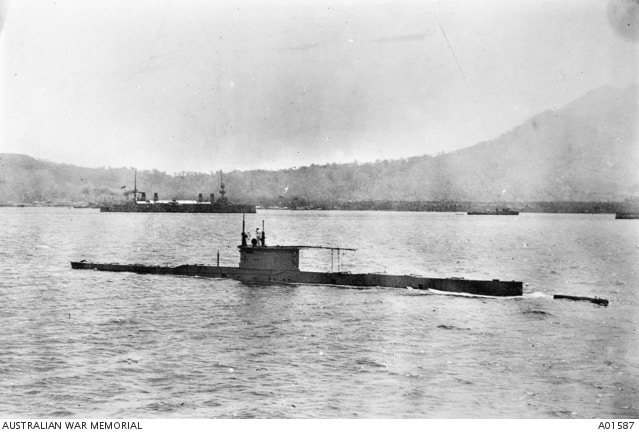
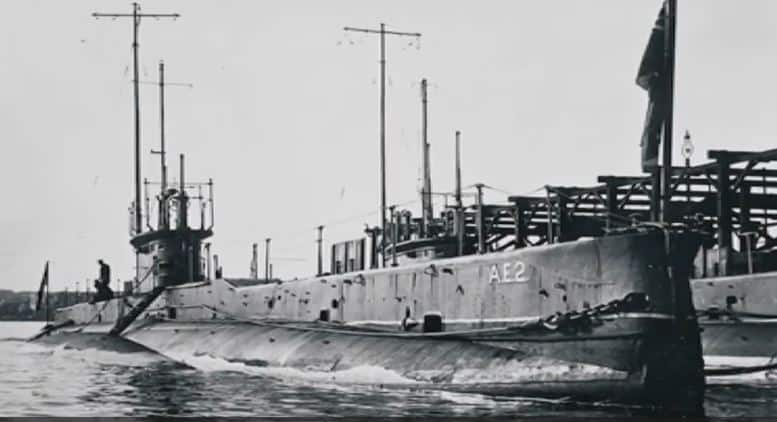
Commissioned in 1914, HMAS AE2 was an E-class submarine of the Royal Australian Navy (RAN). Alongside her ill-fated sister ship, AE1, she completed the longest submarine transit in history at the time—a grueling voyage from Britain to Australia that marked a monumental achievement for the nation’s fledgling navy.
Wartime Service and the Dardanelles
With the outbreak of World War I, AE2 was initially deployed to German New Guinea with the Australian Naval and Military Expeditionary Force, followed by strategic patrols around Fiji. However, her most defining chapter came after her transfer to the Mediterranean theater.
During the Gallipoli Campaign, AE2 achieved naval immortality by becoming the first Allied submarine to successfully breach the heavily mined, fort-lined Dardanelles strait, entering the Sea of Marmara. For five days, she harassed enemy shipping and disrupted Ottoman supply lines, providing a vital morale boost to the Anzac troops landing on the beaches.
Legacy and Preservation
The submarine’s daring mission came to an end when mechanical faults and damage from an Ottoman torpedo boat forced her crew to scuttle the vessel. While the entire crew survived and was captured, AE2 remains an enduring symbol of bravery, innovation, and resilience. Notably, she holds the solemn distinction of being the only RAN vessel lost to enemy action during World War I.
After resting undisturbed for over eighty years, the wreck was discovered in 1998 by the Rahmi M. Koç Museum. Recognizing her immense historical significance, a joint agreement between the Australian and Turkish governments determined that this iconic piece of shared wartime history would be preserved and protected in situ, at her final resting place on the seaford.
HMAS Castlemaine, a video story
HMAS Castlemaine: Guardian of the Coastline
Commissioned during the dark early days of World War II, the Bathurst-class corvette HMAS Castlemaine played a vital role in defending Australian waters. Her wartime service was defined by relentless convoy escort duties, anti-submarine warfare, and vital coastal patrols. As conflict pushed further north, she stood on the front lines of the New Guinea and Timor campaigns, providing critical operational support to Allied forces striking back against enemy advances.
Post-War Transition and Preservation
Following the cessation of hostilities, the Castlemaine briefly transitioned to a peacetime role, serving as a stationary training vessel for the Royal Australian Navy Reserve until she was paid off in late 1945.
While most of her sister ships were sold for scrap or transferred to foreign navies, the Castlemaine was ultimately saved from the breaker’s yard. Handed over to the Maritime Trust of Australia, she underwent an extensive, decades-long restoration process to return her to her authentic wartime configuration.
A Living Monument
Today, permanently berthed as a museum ship at Gem Pier in Williamstown, Victoria, HMAS Castlemaine serves as an educational time capsule. Visitors can step aboard to explore her decks, engine rooms, and mess decks, gaining a firsthand look into the daily lives of the crews who manned these essential “workhorses of the fleet.” She stands as a proud, enduring reminder of the bravery and sacrifice of Australia’s wartime sailors, preserving a tangible piece of the nation’s naval heritage.
HMAS Australia, history
HMAS Australia: Flagship of the Fleet
HMAS Australia (I84/D84/C01), a County-class heavy cruiser, was one of the most formidable and heavily contested warships in the history of the Royal Australian Navy (RAN). As one of two Kent-subclass cruisers ordered specifically for Australia’s defense, she was engineered to be a powerful, versatile instrument of sea power—capable of engaging enemy surface fleets, enduring heavy air attacks, and bombarding fortified shore installations.
A Global Wartime Odyssey
Launched in 1927 and commissioned into service in 1928, Australia became a centerpiece of Allied naval strategy during World War II. Her service was truly global, spanning the Mediterranean, the Indian Ocean, and the fiercely contested waters of the Pacific. Her primary operations included:
Convoy Escort & Protection: Guarding vital Allied troop and supply lines across vast oceans.
Surface Engagement: Hunting enemy raiders and trading fire with hostile warships.
Amphibious Support: Providing devastating naval gunfire support during critical Allied landings across the Southwest Pacific.
Trial, Triumph, and Legacy
Throughout the conflict, Australia proved to be incredibly resilient, frequently operating on the front lines. She suffered severe damage from multiple kamikaze strikes later in the war—becoming one of the primary targets of this devastating tactic—and endured the profound loss of her sister ship, HMAS Canberra, during the tragic Battle of Savo Island in 1942.
Despite the heavy scars of battle, Australia survived the war, continuing to serve her nation until she was decommissioned in 1954 and subsequently sold for scrap. Though the physical vessel is gone, the “Aussie” leaves behind a legendary heritage of courage, determination, and sacrifice that remains deeply ingrained in the bedrock of Australian naval history.
The Voyager Tragedy: A Collision at Sea
The collision between the aircraft carrier HMAS Melbourne and the destroyer HMAS Voyager—known widely as the Melbourne–Voyager incident—stands as the most devastating peacetime disaster in the history of the Royal Australian Navy (RAN). The tragedy occurred on the night of February 10, 1964, during joint tactical maneuvers off Jervis Bay.
Fatal Maneuvers in the Dark
That evening, Melbourne was actively conducting night-flying exercises for her aircraft, while Voyager was assigned the vital role of “plane guard.” Positioned to the rear and port (left) side of the carrier, Voyager’s primary responsibility was to swiftly rescue any aircrew in the event of a ditching or crash.
As the two warships executed a series of tactical turns to reverse their courses, Voyager temporarily ended up ahead and to the starboard (right) of the carrier. To resume her protective station, Voyager was instructed to return to the plane guard position. Standard protocol dictated that the destroyer turn away from the carrier to the right, looping safely around Melbourne’s stern.
The Fatal Turn
Instead, Voyager initiated a right turn but unexpectedly swung back to the left, putting her on a direct collision course across the carrier’s bow.
On Melbourne’s bridge, officers initially assumed Voyager was executing a standard tactical zigzag to allow the heavier carrier to pass before dropping into position behind her. Tragically, this was a misunderstanding. While initial post-incident inquiries heavily criticized the destroyer’s bridge, modern historical analyses suggest a more nuanced reality: Voyager’s Officer of the Watch was not necessarily inattentive, but was likely misorientated while trying to manually calculate the ship’s relative positioning in the dark, leading to the fatal turn that cut the destroyer in two.